




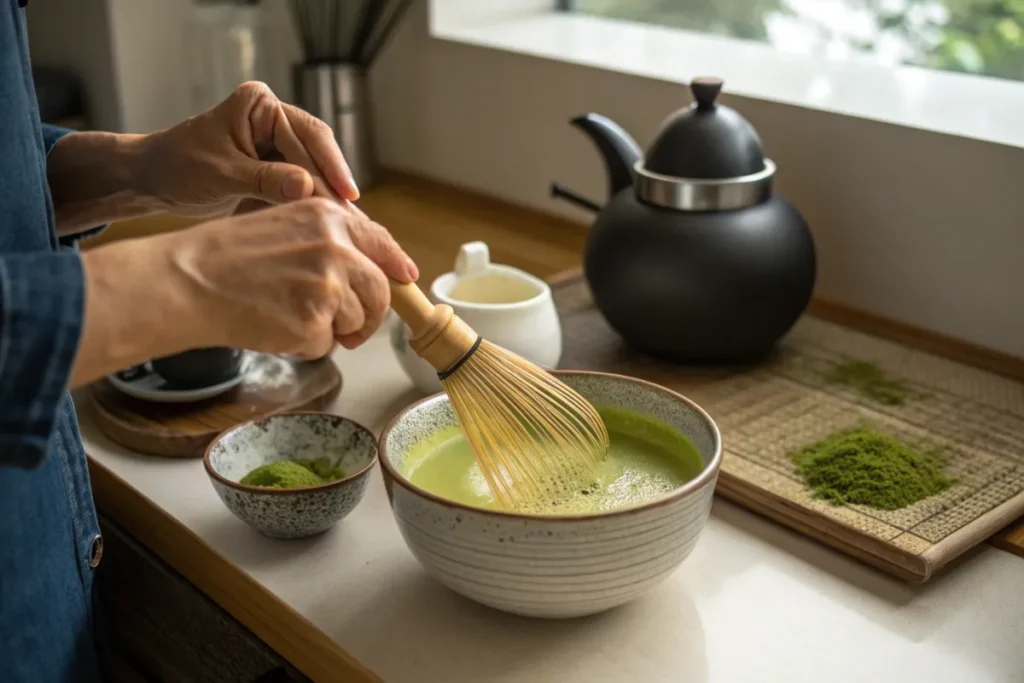
Matcha stands as a mindful alternative to coffee, known for its vibrant green color and rich umami flavor. When you prepare it at home, you control taste, texture, and intensity while saving money compared to daily café purchases.
Learning how to make matcha correctly transforms it from a bitter drink into a smooth, creamy, and energizing ritual. Precision matters. Small details like water temperature and whisking technique define the final result.
Understanding Matcha Grades: Quality Defines the Experience
Before you prepare it, you must choose the right grade. Not all matcha delivers the same flavor or purpose.
Ceremonial vs Culinary Matcha
Ceremonial Grade
- Made from first harvest leaves
- Bright emerald green color
- Naturally sweet with low bitterness
- Best for drinking straight
Culinary Grade
- Made from later harvest leaves
- Slightly duller green tone
- Stronger and more bitter
- Ideal for lattes, baking, and recipes
How to Identify The High-Quality
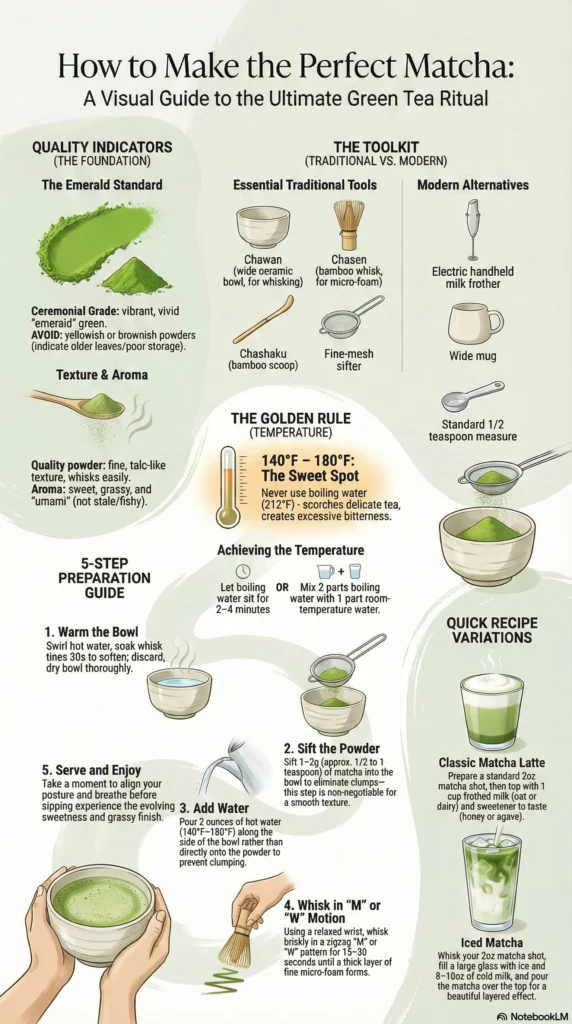
Look for these key indicators:
- Color: vivid, bright green
- Texture: ultra-fine, like talc powder
- Aroma: fresh, grassy, slightly sweet
If the powder looks yellowish or smells dull, it will taste flat and bitter.
Essential Tools: Traditional vs Modern Setup
The right tools improve texture and consistency.
Traditional Tools
- Chawan (matcha bowl): wide shape allows proper whisking
- Chasen (bamboo whisk): creates smooth foam and blends evenly
- Chashaku (bamboo scoop): measures precise portions
- Furui (sifter): breaks clumps before whisking
Sifting is non-negotiable. Without it, matcha forms lumps that ruin texture.
Modern Alternatives
If you want convenience:
- Use a small kitchen sieve instead of a traditional sifter
- Use a handheld electric frother instead of a bamboo whisk
These tools work well, but they produce a slightly different foam texture than a chasen.
Water Temperature: The Most Critical Variable
Water temperature directly controls flavor.
Ideal range: 160°F to 175°F (70°C to 80°C)
Boiling water at 212°F destroys delicate compounds. It scorches the powder and creates sharp bitterness.
Practical tip:
Boil water, then let it sit for 5 to 7 minutes before using it.
How to Make Matcha (Usucha Method Step by Step)
This method creates Usucha, or thin matcha. It is the most common preparation.
Step by Step Instructions
- Sift the Matcha
Add 1 to 2 grams into your bowl through a fine sifter - Add Water
Pour about 60 to 70 ml of hot water at 70 to 80°C - Position the Whisk
Hold the chasen lightly and keep your wrist relaxed - Whisk in an M or W Motion
Move quickly in a zigzag pattern
Do not stir in circles - Create Foam
Continue whisking until you see fine micro bubbles and a jade green froth - Finish Smoothly
Slow down and gently smooth the surface
A proper matcha should look creamy, vibrant, and slightly foamy on top. If you want to read more about the benefits of matcha, I suggest you read this healthline article.
Matcha Latte Recipe (Modern Favorite)
This recipe balances matcha intensity with creamy texture.
Ingredients
- 1 to 2 grams
- 60 ml hot water
- 240 ml milk of choice
Steps
- Prepare a matcha shot using the Usucha method
- Heat and froth the milk
- Pour the milk over it
- Stir gently for a smooth blend
You can adjust sweetness with honey or syrup, but high-quality matcha often needs none.
Troubleshooting Common Mistakes
Even small errors affect the result.
Bitter taste
- Water is too hot
- Matcha quality is too low
Lumpy texture
- You skipped sifting
- You did not whisk properly
Weak flavor
- Too much water
- Not enough matcha
No foam
- Whisking too slowly
- Incorrect motion
Precision improves every cup.
Matcha Care and Storage
Proper storage protects flavor and color.
Storage Tips
- Keep it in an airtight container
- Store it in the refrigerator after opening
- Avoid light, heat, and moisture
Whisk Maintenance
- Rinse the chasen with cool water only
- Never use soap
- Let it air dry completely
A well-maintained whisk lasts longer and performs better.
Conclusion: Master the Ritual
Learning how to make matcha goes beyond following steps. It requires attention to detail, quality ingredients, and consistent technique. Once you master the fundamentals, you can adapt the process to your taste and lifestyle.
Start simple. Focus on temperature, sifting, and whisking. With practice, each cup becomes smoother, richer, and more enjoyable.