If you are building a new website or you want to experiment new features, plugins or themes, or even if you want to perform an update on your existing website, the safest way is to work on a local version of the website. that’s why you need to learn how to install WordPress locally.
Also, working on a local website can be more efficient if you are travelling or working in a location with limited internet access. You can continu working on your project when you are offline.
In this post you will learn how to install WordPress locally on your Windows or Mac computer.
Reasons to install WordPress locally
There are many reasons why you should first install WordPress locally on your computer before going live:
Safe environnement
By installing and running WordPress Locally on your computer you allow yourself to work in a safe environnement where you can test new features, plugins and themes without affecting your live website. This allows you to work and edit your website without the risk of breaking your site or losing data.
Accessibility
With your website running on your local computer, you can continu working even if there is no internet connection. This can be useful in many situations like when you are in a location or with limited or no access to internet.
Learning WordPress
If you are new to WordPress, installing it on your computer instead in a live server, can be very useful to learn how it works and try its features.
It is free for beginners
An additional bienfit is that installing WordPress locally is completely free, it is an excellent option if you want to develop your website before purchasing a domain and a hosting plan.
Minimum system requirements
You can install WordPress either on Windows or Mac computers. Here are the system requirements:
- Hardware requirements: At least 4GB of RAM and 2GB of free disk space.
- Software requirements: PHP 7.4 or higher, MySQL 5.6 or higher (Or MariaDB 10.1 or higher), local web server environnement such as Apache or Nginx.
These are the minimum system requirements, more RAM and more disk space is recommended for smooth experience or for large websites.
How to install WordPress locally
To install WordPress you will need a web development software capable of making WordPress run on your computer. This software is often the combination of 3 components that work together to create an environnement that supports a local website. Instead of installing them separately, you can download them in one package using WAMP Server or XAMPP for Windows platforms, and MAMP for Mac.
Installing WordPress on Windows
To install WordPress on a Windows computer you will need to use either WAMP Server or XAMPP. It only depends on your preference. Both software are capable to do the job.
For this guide we will use XAMPP.
1. Download and install XAMPP
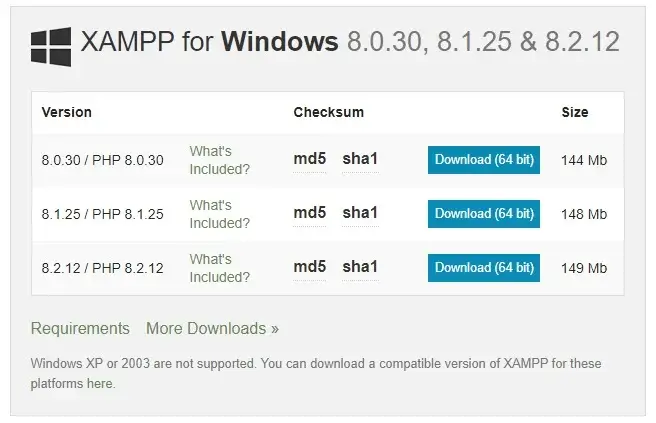
Before installing your CMS setting up the environnement is one of the most important steps. This can be done by installing a server/database package as XAMPP wich includes PHP, Apache Web Server and MySQL as a database system.
- Go to WAMPP official download page and choose the version that aligns with your operating system. For this example Windows 10. Make sure to choose the option that works best with the latest PHP version.
- Once the download finished, run the installer. This will launch XAMP installation process.
- Once the installation complete, launch the XAMPP control panel and make sure to check the Apache and MySQL options. This is necessary for installing WordPress.
2. Download and extract WordPress files
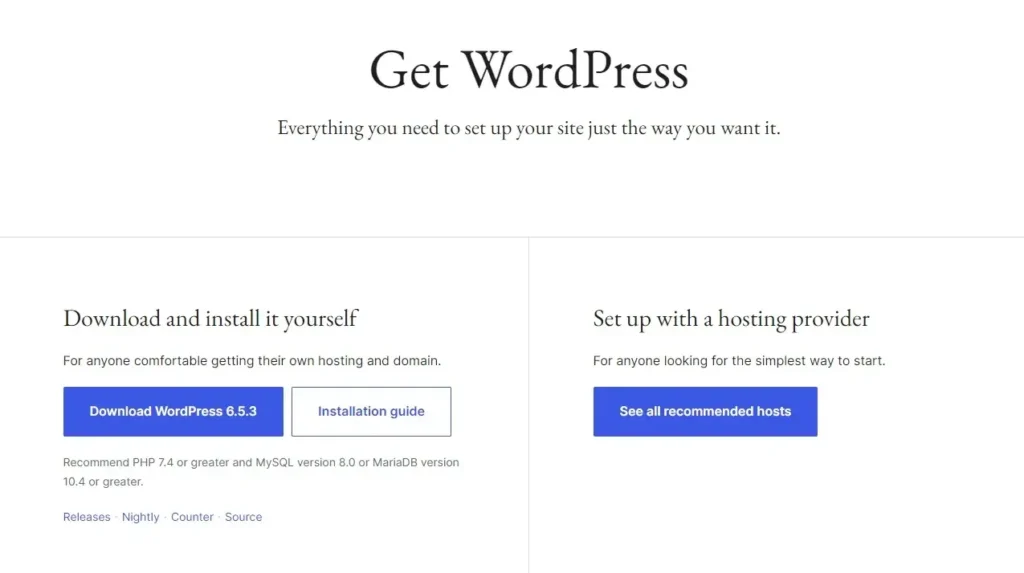
- First download WordPress from the official download page.
- Navigate to XAMPP folder in C drive (C:\xampp) then go to htdocs folder. Create a folder with the name of your new website and extract the files of the downloaded ZIP file in this folder.
3. Create a local Database
- Go to XAMPP Control Panel and select the Admin button of MySQL module. That will launch PhpMyAdmin (This is a database administration tool for MySQL and MariaDB databases) on your default web browser.
- Open Databases tab, enter the database name, set the drop-down menu to to Collation then click on Create. Your new database should be created and it will appear on the left sidebar of PhpMyAdmin.
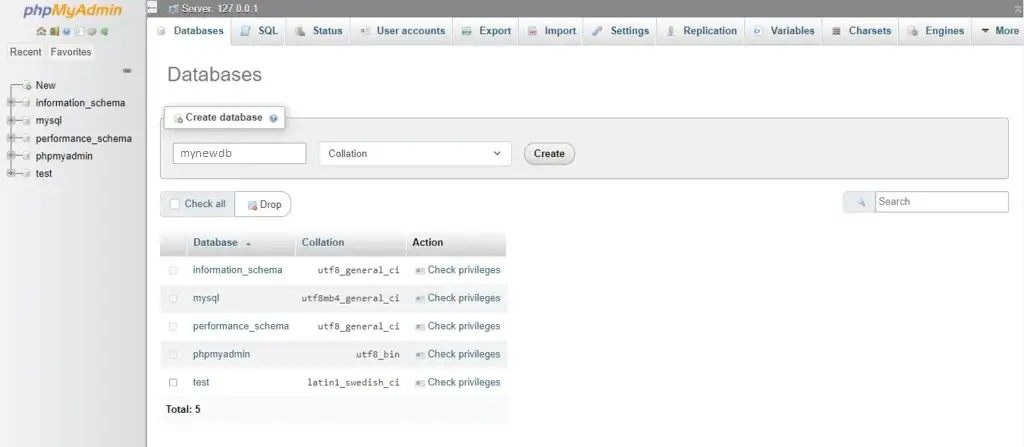
Note: You can usually access PhpMyAdmin at http://localhost/phpmyadmin, depending on your port configuration. For example: http://localhost:80/phpmyadmin/.
4. Install WordPress
- Now, launch the WordPress installation by visiting http://localhost/websitename, where “websitename” is the name you gave to the folder in the step 2. Automatically you will be redirected to http://localhost/websitename/wp-admin/setup-config.php
Note: Make sure to replace “websitename” by the name of the folder containing your website files inside htdocs folder of XAMPP.
- WordPress will give a you a list of information that you will need during the installation process. Make sure to have this prepared. Then click Let’s go!
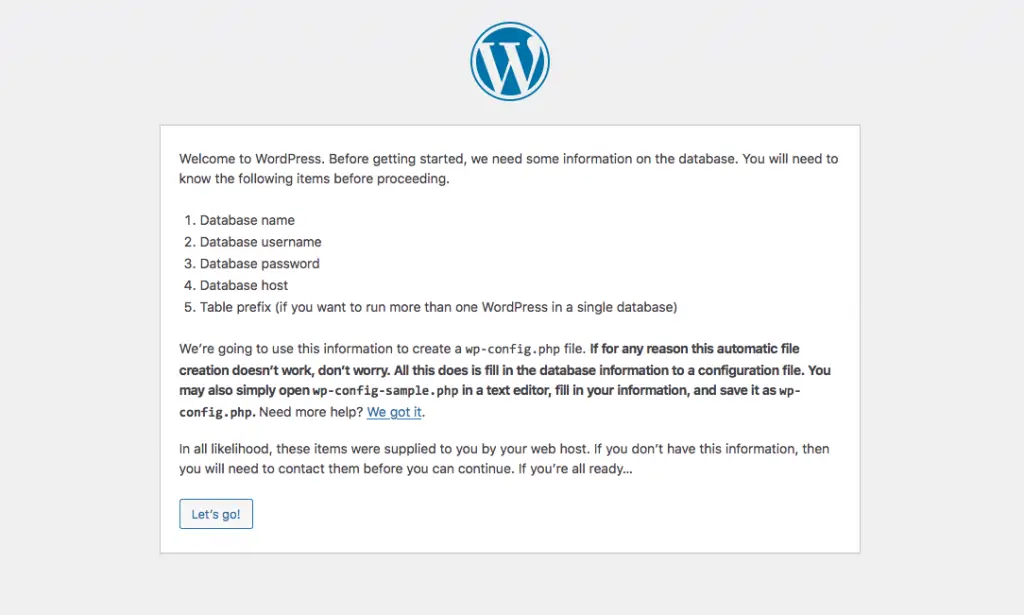
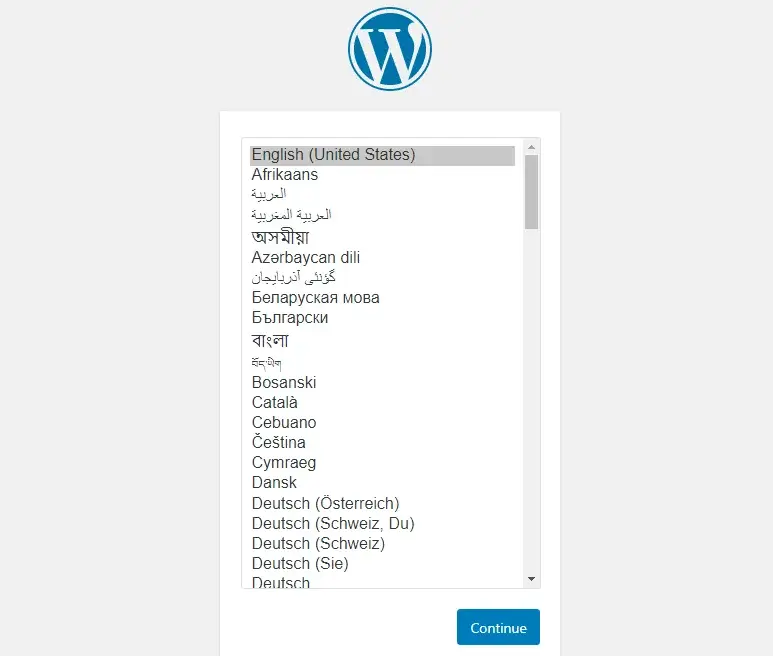
- Select the language and click on Continue.
- WordPress requires a list of information to build the localhost site. Fill in the database information as follows:
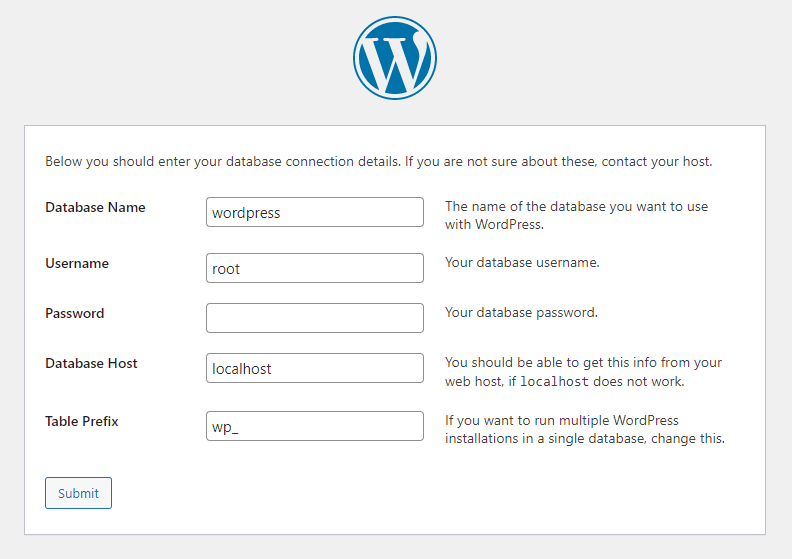
- After inserting all the needed information, click Submit. The next screen is a database configuration success confirmation.
- Click Run the installation to begin the WordPress installation process.
- Fill in the additional information such as the website’s name, the username and the password to access WordPress Admin Dashboard. Then click Install WordPress button.
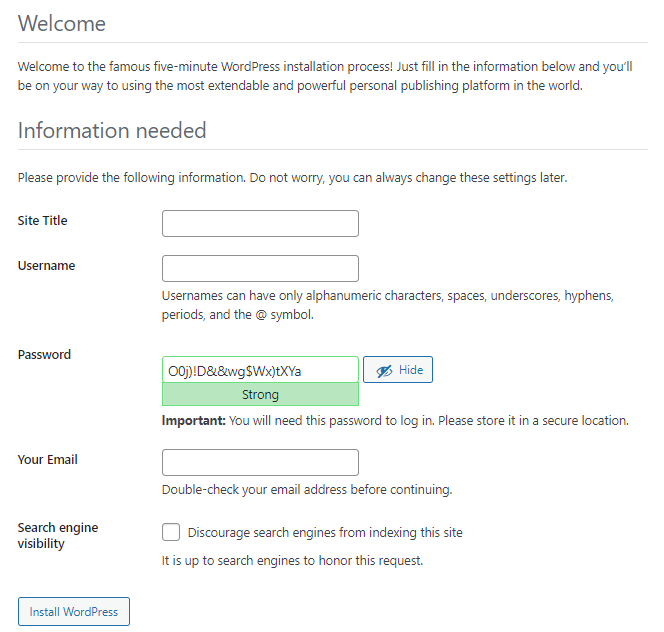
On Windows (and Linux) environnements, WordPress will store this information in the wp-config.php file.
5. Check the local website
Your local website is now ready. Go to http://localhost/websitename/wp-admin and use the login and password you created in the step 4 to access the WordPress Dashboard.
Go to http://localhost/websitename to access your local website front page.
Installing WordPress on Mac
To install WordPress on a Mac computer, like on windows you will need to install a software that creates the right environnement to run your website locally. That said, the steps slightly differs but the overall WordPress using process remains the same.
1. Download and install MAMP
- Go to the MAMP official download page for Mac computers and click free download. Choose the version that aligns with your operating system. For this example MacOS.
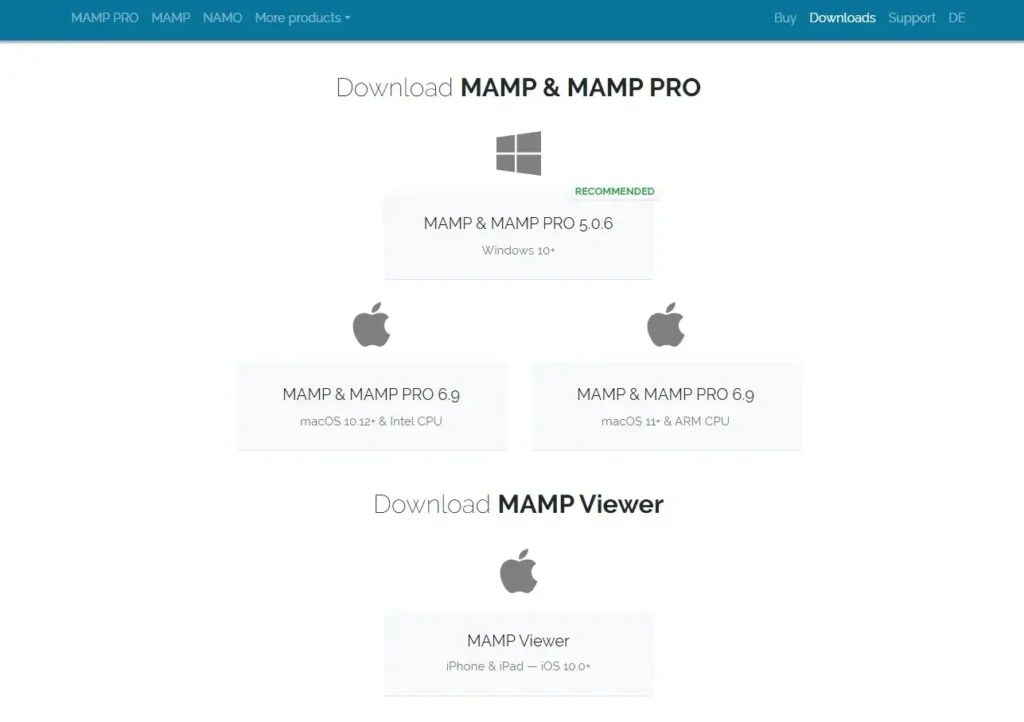
- Once the download finished, run the installation wizard. This will launch MAMP installation process. You may be asked to install the pro version, just ignore that as it is not mandatory and you can start with the free version. You’ll either need to choose Download for Mac (Intel) or Download for Mac (Apple), depending on the version of your device.
- Once the installation complete, go to the MAMP controller and start the server.
2. Configure MAMP
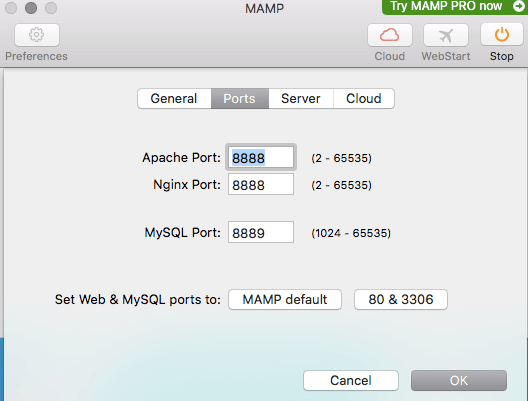
- Launch the MAMP app by double clicking its icone and go to Preferences menu (it is located in the upper left corner). Then select the Ports tab. Check if your Apache port is set to “8888”, if not update it. The same with MySQL port that should be set to “8889”.
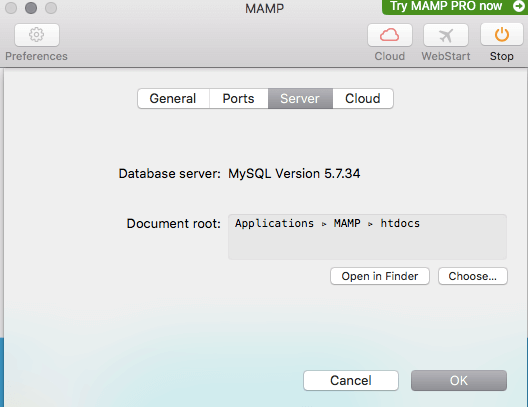
- Then, go to Web Server tab and choose the folder where you want to store your website files. By default it’s Applications/MAMP/htdocs. You can change it if you want.
2. Download and extract WordPress files
- First download WordPress from the official download page.
- Navigate to MAMP folder you chose in the previous step. Create a folder with the name of your new website and extract the files of the downloaded ZIP file in this folder.

3. Create a local Database
- Go back to MAMP Control Panel and click on the button Webstart to launch MAMP welcome page on your default web browser. Go to Tools drop-down menu and click on PhpMyAdmin. That will launch PhpMyAdmin.

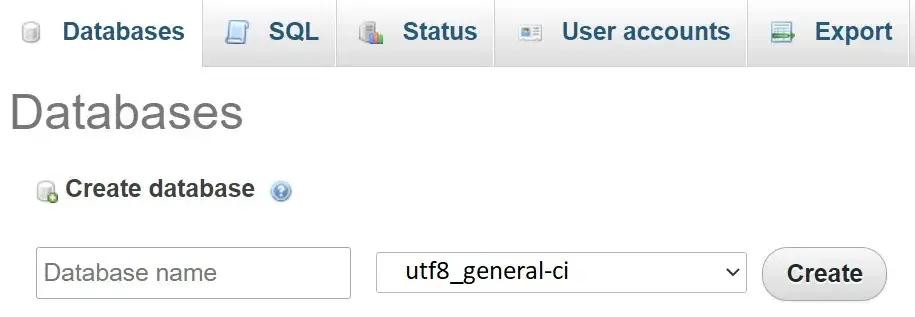
- Open Databases tab, enter the database name, set the drop-down menu to to utf8_general-ci then click on Create. Your new database should be created and it will appear on the left sidebar of PhpMyAdmin.
4. Install WordPress
- Same as on a Windows environnement, launch the WordPress installation by visiting http://localhost/mywebsite, where “mywebsite” is the name you gave to the folder in the step 2. Automatically you will be redirected to http://localhost/mywebsite/wp-admin/setup-config.php
Note: Make sure to replace “mywebsite” by the name of the folder containing your website files inside htdocs folder of MAMP.
- Same as in the Windows 10 environnement, WordPress will give a you a list of information that you will need during the installation process. Make sure to have this prepared. Then click Let’s go!

- Select the language and click on Continue.

- WordPress requires a list of information to build the localhost site. Fill in the database information as follows:

- After inserting all the needed information, click Submit. The next screen is a database configuration success confirmation.
- Click Run the installation to begin the WordPress installation process.
- Fill in the additional information such as the website’s name, the username and the password to access WordPress Admin Dashboard. Then click Install WordPress button.

WordPress will provide a code snippet for macOS users to replace the existing wp-config PHP file content.
5. Check the local website
Your local website is now ready. Go to http://localhost/mywebsite/wp-admin and use the login and password you created in the step 4 to access the WordPress Dashboard.
Go to http://localhost/mywebsite to access your local website front page.
Errors and troubleshooting of local WordPress installation
Sometimes things does not go right and you may encounter some errors during or after the installation. Here are some of the most common errors of WordPress local installation and their troubleshooting tips:
- Error 404 (Page not found): Go to Settings->Premalinks and make sure that it’s on Post name or Custom Structure.
- Error establishing database connection: Check the database name, user and password in wp-config.php file. Make sure that they match the credentials of the database you created for the website (Step 3).
- Failed to connect to the FTP Server: Check FTP hostname, port, login and password.
- HTTP error when uploading images: Increase the PHP memory_limit and maximum_file_size in php.ini file.
- White screen: Switch to default theme and disable plugins. Then check again and proceed by elimination.
WordPress local installation optimization
For better performance and ease of use, you have to optimize your local installation of WordPress. Here are some useful tips:
- Increase PHP Memory limit: Go to your wp-config.php file and add the following line: define(‘WP_MEMORY_LIMIT’, ‘512M’).
- Disable unused or unnecessary plugins: Check the list of your plugins, if there is any unnecessary ones or unused ones, disable them. You can also uninstall them.
- Use a cashing plugin: Install a cashing plugin like LiteSpeed Cache or W3 Total Cache
- Use a lightweight theme: Chose a theme with minimal design and optimized for loading speed.
- Optimize the images: Use image compression tools like TinyPNG or Imagify. But make sure to not compromise the quality of the images.
Frequently asked questions
If you still have any questions about WordPress local installation or about running WordPress locally, here are some frequently asked questions and their answers:
Can I migrate my local WordPress site to a live server?
Yes, you can migrate your locally hosted WordPress website to a live server. You can do this either by using a migration plugin which is the easiest way or by doing it manually by transferring the website files to the new server via FTP, and doing a back up of the local database and importing it in the live server.
Some hosting providers provide custom local tools that can help you to migrate your website to your new server with few clicks.
Can I access my locally installed WordPress from other devices in the same network?
Yes, you can access your local installation of WordPress from other devices in the same network. You can do this by using the IP address of the computer hosting the local version of WordPress site.
For instance, if the IP address of the computer hosting the website is 192.168.1.6, got to the browser of the other device (In the same network) and type https://192.168.1.6
Can i update locally my WordPress website and its plugins?
Yes, you can update WordPress locally and you can update also the plugins locally. The way to do it is the same as how you do it in a live website. The update process should work just as normal as long as you have internet connection.
How can i back up my local WordPress website?
The back up process of a local WordPress website is the same as a live WordPress web site. You can use back up plugins or do it manually by creating a copy of your website (Files and database) and store theme anywhere you want.


